glow-vogue.site
  • Beauty
    • Beauty
    • Arab Beauty
    • Asian Beauty
    • British Beauty
    • Canadian Beauty
    • Indonesian Beauty
  • Cosmetics
  • Fashion
    • Fashion Over 50
    • Luxury Fashion
    • Plus Size Fashion
    • Sustainable Fashion
    • Women’s Fashion
  • Hair Styling
  • Skin Care
  • Uncategorized
Tag:

DIY

Beauty

Top 10 Monsoon-Proof Nail Art Ideas You Need This Season (+ Easy DIY Tips)

by Lina Clémence July 20, 2025
written by Lina Clémence


 The monsoon season is here, and while we love the cosy weather, rain and humidity can wreak havoc on our nail art. Chipped polish, smudged designs, and dull-looking nails are common problems. But don’t worry! We have rounded up the top 10 monsoon-proof nail art ideas that will keep your nails looking vibrant, fresh, and Instagram-ready, no matter how wet it gets outside!

1. Gel Polish Magic

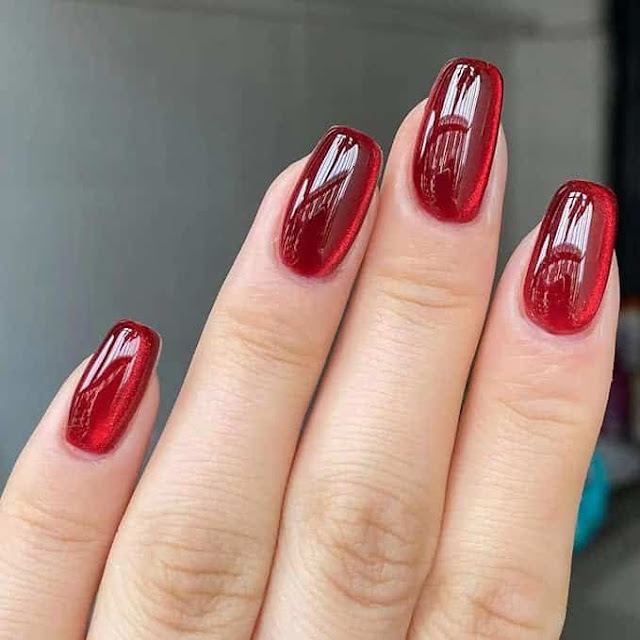
Gel nail polish is your best friend during the rainy season. It lasts longer, doesn’t chip easily, and retains shine despite humidity. Opt for gel-based manicures with bold colours like royal blue, deep green, or berry shades to brighten up grey, rainy days.

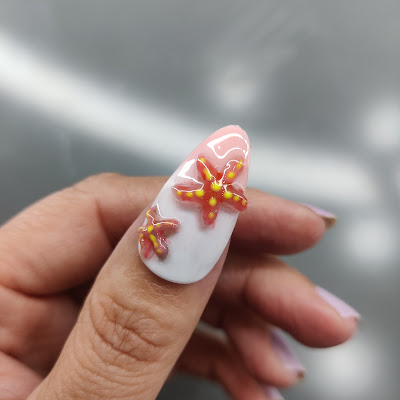
2. Rain Drop Nail Art


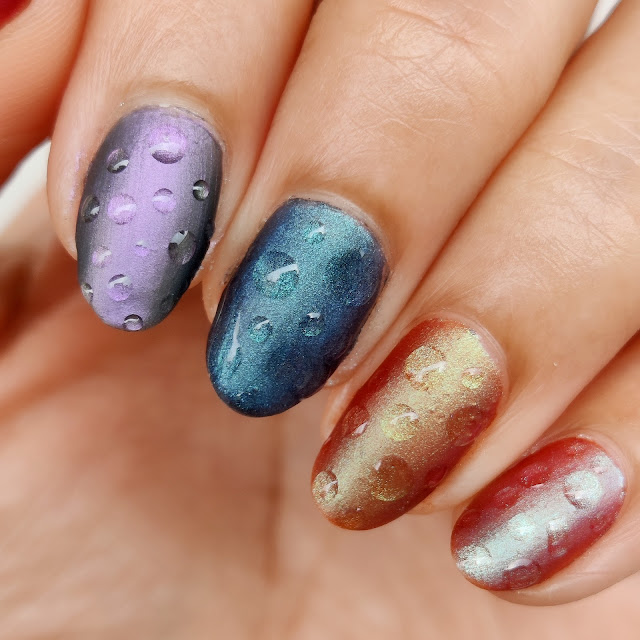
Celebrate the monsoon with adorable raindrop nail art! Use a glossy top coat to create 3D raindrop effects over pastel or sky blue nails. It’s minimal, chic, and totally on-theme.

DIY Tip: Use a dotting tool or the tip of a bobby pin to create perfect raindrop patterns.

3. Waterproof Matte Nails

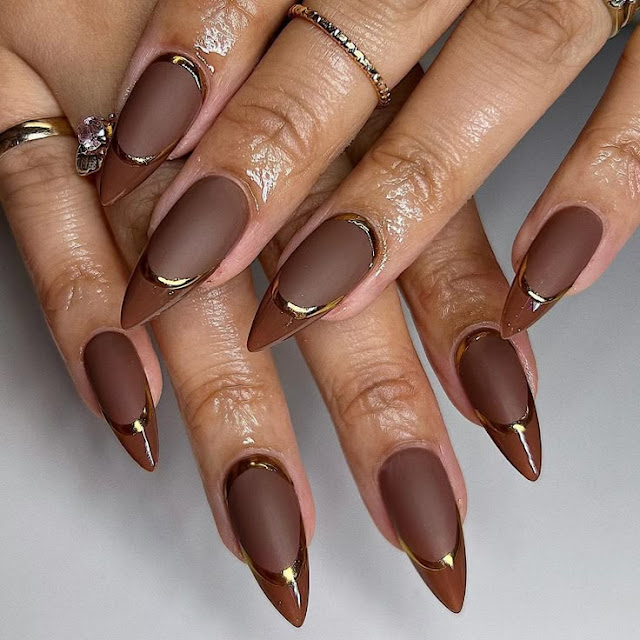
Matte nails are less prone to smudging compared to glossy finishes during humid weather. Try waterproof matte nail polishes in earthy tones like mustard, olive, or maroon to complement your monsoon wardrobe.

4. Cloudy Sky Nails


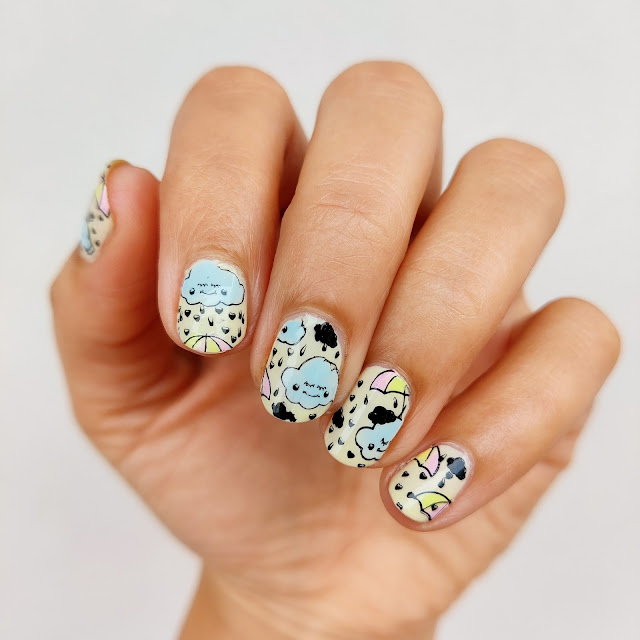
Bring the cloudy skies to your fingertips with cloud-inspired nail art. Soft greys, whites, and light blues make for a dreamy combination.

Bonus Tip: Add tiny lightning bolt stickers or decals for an edgy twist.

5. Metallic & Chrome Nails

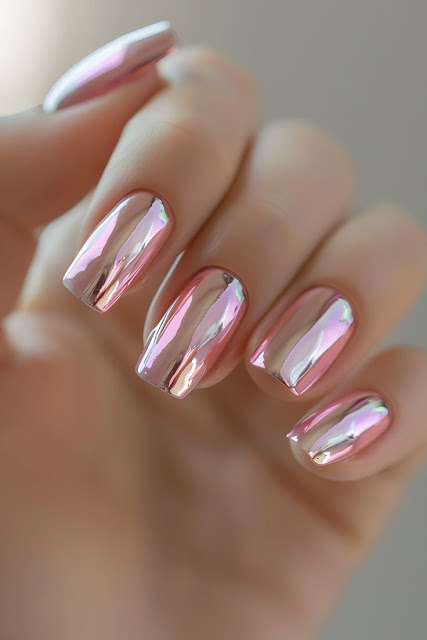
Shiny metallic or chrome nails reflect light beautifully, even on gloomy days. Plus, they are durable and can withstand occasional rain splashes without losing their lustre.

6. Monsoon Florals

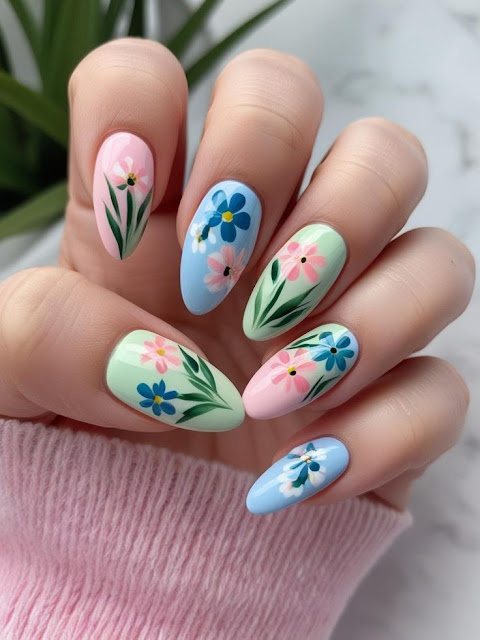
Florals aren’t just for spring! Monsoon-themed floral nail art with darker backdrops like navy or forest green can make the colours pop and last longer.

DIY Hack: Use nail stamping kits for intricate floral patterns with ease.

7. Jelly Nails

Translucent jelly nails are trendy and perfect for monsoon. They give a playful, waterproof effect and can be customised with glitter or tiny fruit designs.

8. French Tips with a Twist

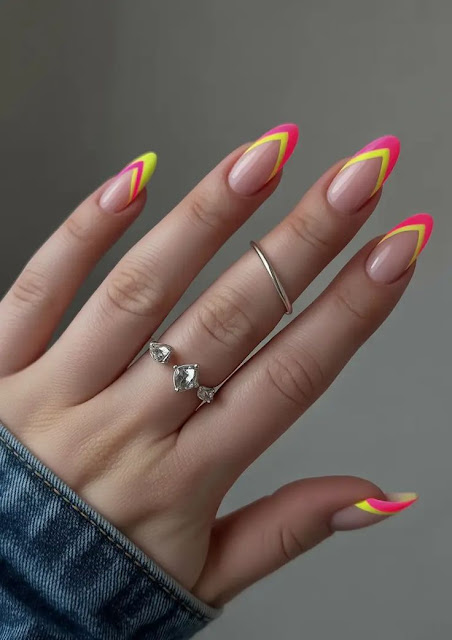
Instead of the classic white, go for vibrant neon or pastel French tips. They are simple yet eye-catching and don’t show chips as quickly.

9. Gradient Rainy Ombre

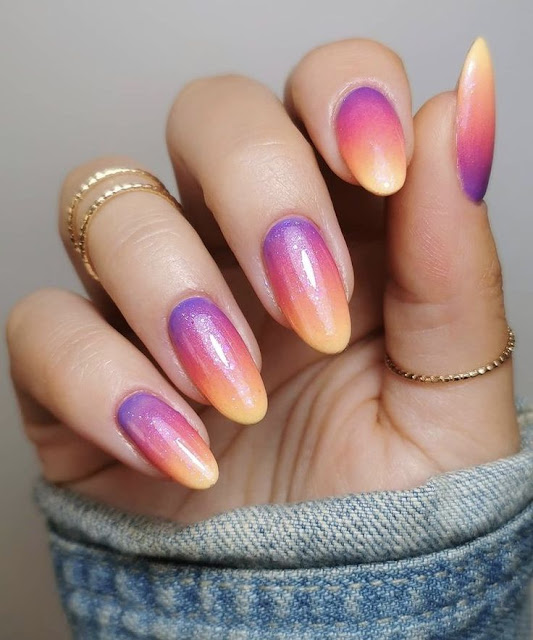
Try an ombre effect that mimics a rainy gradient – think grey fading into soft blue or purple. This subtle blend looks elegant and is less likely to show wear and tear.

10. Glitter Rain Nails

Add a sprinkle of glitter to your nails to mimic the shimmer of raindrops under streetlights. A glitter top coat not only beautifies but also adds an extra layer of protection.

Nail Care Tips for Monsoon:

  • Always apply a base coat to protect your nails from staining and moisture damage.

  • Use a good-quality top coat to seal in your nail art.

  • Keep your hands dry and moisturised to prevent fungal infections.

  • Avoid low-quality nail polishes that chip easily in humidity.

Final Thoughts

With these monsoon-proof nail art ideas, you can stay stylish even when the rain pours down! Don’t forget to share your creations on Instagram and tag us @CrazyNailzz for a chance to get featured.

For more nail art inspiration, DIY tips, and the latest trends, keep following www.crazynailzz.com!

FAQs

Q1. How can I make my nail polish last longer during the monsoon?
Apply a base coat, use gel or long-lasting polishes, and always finish with a high-quality top coat.

Q2. What are the best colours for monsoon nail art?
Deep greens, blues, berry shades, metallics, and pastel tones work great for the season.

Q3. Is matte or glossy better for monsoon?
Matte nails can resist smudging better in humidity, but a glossy gel finish with a top coat can also last long.

Lots of Love!!!

XOXO


July 20, 2025 0 comments
0 FacebookTwitterPinterestEmail
Cid Style File: DIY Fashion
Plus Size Fashion

Cid Style File: DIY Fashion

by Lina Clémence July 12, 2025
written by Lina Clémence


I’m a little late with this post, but this time I have a really good excuse!  Started working again this week after almost 6 months of unemployment. Thank you sweet baby Jesus. So yeah, those super early wake up calls, morning/evening commutes and getting use to a new routine has me a bit out of sort this week. I am so grateful to be working again, but I just can’t stay up late working on the blog and then get up super early like I use to! Those days are gone, ah Fab 40’s you making me look like an old lady….LOL Any how this month theme chosen by Diane is DIY!  I have wanted to do DIY on the blog for years. So many ideas swirling in my brain, I even have a box of stuff I bought for my DIY fashion post.  Nope, never happened so kinda glad the Fab 40’s crew had this challenge for this month. I am still planning on doing a denim patch DIY, so lets cross our fingers it gets done this summer.

Since I am the queen of procrastination, this was my on the fly, done in an hour DIY!  I had a cool denim DIY idea in mind, but was missing a few pieces.  Since I am not one to quit or give up easily, I dug into the closet and found this big boxy camo tee the BF bought me.  I mentioned once I wanted a cool camo tee, yeah this was not it.  No worries DIY to the rescue.  The whole choker trend has been translated into t-shirts and I wanted to buy one any way, so why not just make my own. Viola!  Cool, camo, choker t-shirt coming right up! 

Originally I was only going to do the choker part, but it was still missing something. I wanted the tee to look a little more feminine and sexy. A few more snips to the sleeves to make it a cold shoulder top.  Yet something still seemed not quite right, well with scissors in hand, a few more snips turned into a bows at the sleeves. Now it was just right! I may do another choker tee and add some distressing.  I will definitely take more pics and even do a tutorial on my next DIY….promise!

Outfit Details
DIY Camo T-shirt – Unbranded
Faux Leather Leggings – Old Navy
Suede Booties – Melrose & Market
Sunnies – Burberry

Here are the ladies of The Fab 40’s with their DIY looks

Totally love Ann’s DIY denim jacket. Can’t wait to make my own.
Diane also use a denim jacket, but went with tie-dye for her DIY. 
Jennie, Miss little over-achiever made 2 DIY items. She made the top and customized her jeans. 2 thumbs up from me! 

Mary from Curlybyrdie Chirps 

I am in love with Mary’s jeans, they are too cool. I wonder if she will make me a pair….LOL 
Tracey is our guest blogger this month, from The Naughty Forty Diaries. She went with a simple, yet very cute patch tee. Also she added some cold shoulder details, like me!  Great minds, thats all I’m gonna say. 

Have you done any DIY fashion?

Thanks for reading and hope you enjoy these Fab 40’s monthly post. Its always fun to collaborate with other awesome bloggers. Make sure you show all my Fab 40’s buddies some love and check out their blogs.  Which DIY was your fave? I loved them and want to do more. 


July 12, 2025 0 comments
0 FacebookTwitterPinterestEmail
Canadian Beauty

DIY Eyebrow Growth Serum

by Lina Clémence June 30, 2025
written by Lina Clémence


This simple, quick, and easy DIY Eyebrow Growth Serum contains natural oils and essential oils that are known to help encourage and stimulate hair growth. Scroll through to learn how you can make this 3 ingredient eyebrow growth serum.

Support your eyebrow growth and thickness with this simple DIY Eyebrow Growth Serum recipe. Apply once daily to enjoy fuller and more conditioned-looking brows.

I used to have very thick brows naturally but over the last few years, I’ve noticed that the mids and tails of my brows look a bit more sparse. At first, I looked into brow growth serums online but I was so surprised by how expensive they were, so I began to think more about how I could make my own at home.

I have shared a lot on here about how I use homemade hair treatments, hot oil treatments, and DIY scalp oil treatments to support my hair growth, shine, and health and I thought I could make something similar for my eyebrows. I also used to use castor oil on my eyelashes to help them grow so I started looking into Castor Oil for eyebrow hair growth a bit more.

How Often Should You Use This DIY Castor Oil Eyebrow Serum?

I personally use this DIY Eyebrow Growth Serum every night. I take off all my makeup and apply a bit of this serum with a spoolie brush before bed as a part of my skincare routine.

In the morning, I usually find there is a slight bit of residue from the oil treatment left on my brows so I use my cleanser to just gently remove any leftover oil. I make sure to be very careful whenever I use a cleanser on my brows, whether to remove makeup or leftover oil from this serum, as it is very easy to cleanse your brows too aggressively and end up pulling out eyebrow hairs.

Can This Be Used On Eyelashes, Too?

I do not use this serum for my eyelashes. Essential oils can be a bit too harsh and strongly scented to use near the eyes so I avoid using them on the base of my eyelashes. Instead, I just use Castor Oil on my eyelashes.

What is in this DIY Castor Oil Eyebrow Serum?

  • Castor Oil
  • Rosemary Essential Oil
  • Optional: Clary Sage Essential Oil or Lavender Essential Oil

What Can I Put DIY Eyebrow Growth Serum In?

I ordered these 10ml Empty Mascara Tubes to make my DIY Eyebrow Growth Serum. They are inexpensive and come in a pack of 3 tubes with different applicator tips so you can make a few different items.

Can I add Peppermint Essential Oil to this Serum?

If you’d like to substitute the Sage Essential Oil or Rosemary Essential Oil for Peppermint Essential Oil you absolutely can. I find Peppermint Oil to be a bit too fragrant to be used around my eyes so I typically don’t use Peppermint Essential Oil. I find that it makes my eyes a bit red and watery. However, if you’re not as sensitive to Peppermint Essential Oil as I am then definitely add it to your brow serum.

Peppermint Essential Oil is a great essential oil to encourage hair growth. It is known to encourage blood circulation to hair follicles which can help with hair growth. I do find using Peppermint Essential Oil in scalp treatments to be a great way to encourage hair growth and I use it often in my DIY Hot Oil Hair Treatments as well.

DIY Castor Oil Eyebrow Serum

Yield:
1

Prep Time:
1 minute

Active Time:
4 minutes

Total Time:
4 minutes

This simple and easy DIY eyebrow growth serum contains natural oils and essential oils that are known to help encourage and stimulate hair growth. Stop by to learn how you can make this 3 ingredient brow growth serum.

Materials

  • 2ml of Castor Oil (about 40 drops or approximately 2 droppers worth)
  • Jojoba Oil
  • 2 Drops of Rosemary Essential Oil
  • Optional: 2 Drops of Sage Essential Oil or Lavender Essential Oil

Instructions

  1. Using a small funnel, pour your Castor Oil, Rosemary Essential Oil, and Sage Essential Oil into your empty mascara tube. Top up the serum with Jojoba Oil.
  2. Place the lid on your serum and rotate 10 times to gently combine the oils.
  3. Your serum is now ready to use!
  4. Store in a cool dry area.

Did you make this project?

Please leave a comment on the blog or share a photo on Instagram


June 30, 2025 0 comments
0 FacebookTwitterPinterestEmail
Hair Styling

Bailey’s Mini Fishtail Braids | DIY Bandana Hairstyle for Short Hair

by Lina Clémence June 23, 2025
written by Lina Clémence


Any of you short-haired people out there will know the struggle when it comes to creating cute braids on your hair! Sometimes it seems like there just isn’t enough hair to do much, especially with braids.

Today I’m going to show you a step-by-step DIY tutorial on just how my daughter Bailey achieves this cute bandana look with some Tips & Tricks for those extra short strands of hair! I’m honestly so glad that bandanas are coming back on trend! They’re SO cute, and can really change up a look! You can find bandanas in most craft stores, online, or any craft section of a superstore. They’re inexpensive, so you might as well grab one in every color! Let’s get started!

Items Needed: hair elastics (texture powder, hairspray, dry shampoo if desired)

Time Requirement: 15-20 minutes

Skill Level: Easy/Medium


DIY Bandana Hairstyle for Short Hair

  • Place the bandana right along the hairline, and pull all of your hair behind it. Secure with a knot at the base of your neck.

  • Pull the bandana back to where you can start to see the hair on the hairline. Pull out 2 small pieces of hair from either side of the part to frame the face.

  • Split all of the hair into 2 main sections.

  • Starting with the right section of hair, separate that section into 2 sections.

  • Take a small piece of hair from the left section, cross it over the left section, and add that small piece into the right section of hair.

  • Take a small piece of hair from the right section, cross it over the right section, and add that small piece into the left section of hair.

  • Repeat step 5-6 until you reach the bottom of the hair (or until you run out of pieces that are long enough to braid. Secure with an elastic.

  • Repeat steps 4-7 on the left section of hair.

  • Pancake the braids to fluff them up if you want to age up the look, top with hairspray if you’d like. Tweak accordingly. Done!

Watch the full tutorial:


June 23, 2025 0 comments
0 FacebookTwitterPinterestEmail
Women's Fashion

DIY: Custom Wall Gallery – Signed, Blake

by Lina Clémence June 20, 2025
written by Lina Clémence


After I painted my stairs, I decided that my stair landing needed a little sprucing up, too. And creating a gallery wall seemed like the perfect solution!

I originally planned to purchase original artwork for the gallery, but ultimately decided to use some of my own images. Over the years I’ve had hundreds of pictures of myself, my friends and Bash taken for brand partnerships so I figured why not use them to make my home feel more personal and welcoming. Why should Instagram get to have all the fun?

Before

I chose 5 pictures of people and places that are special to me, edited them into black and white and then had them custom framed by art.com. I simply uploaded my images to their online portal, chose my frame and matting specifications and they were shipped out to me about a week later.

You can swipe through the slideshow below to get a close up view and description of each of the images I included in the wall gallery.

The Chicago Theater

The Chicago Theater

This was originally an image of me on my Canam Ryker. I used a little AI magic to create an image that showcases my favorite city in the world.

My First NYFW

My First NYFW

This image was shot last year during my first New York Fashion Week experience and is easily one of my favorite pictures of me.

Best Friends Forever

Best Friends Forever

What is a wall gallery without my favorite picture of my favorite person.

The Love of My Life

The Love of My Life

No collection of my favorite things is complete with the love of my life, Bash. My entire heart and soul in the form of a four legged fur ball.

My Childhood Home

My Childhood Home

It felt like a full circle moment to include a photo of my childhood home in the new home I’m creating for myself.

After

Hanging the frames was a bit of a process given how high up the top images needed to be placed. But a little bravery and an adjustable ladder from the Home Depot got the job done.

There have been quite a few decor updates to my home since my last post (I know, I know). So expect to see those all rolling out over the next few weeks. In the meantime, you can shop my upstairs hallway and create your own custom wall gallery below.

Shop the Post:


June 20, 2025 0 comments
0 FacebookTwitterPinterestEmail
Beauty

Nourish Your Skin with a DIY Coconut + Honey Body Wash

by Lina Clémence June 9, 2025
written by Lina Clémence


I’m on a mission to detox my beauty products and replace them with natural DIY alternatives. Whipping up a homemade body scrub is an addicting starting point because pretty soon you start thinking, what about the stuff I use every day? The first two I tackled were biggies—deodorant and toothpaste—and now I’m on a roll! Next up: a body wash with 2 of my favorite ingredients, honey and coconut oil, for a nourishing and wonderfully-smelling honey body wash.

Homemade Body Wash with Honey + Coconut Oil