glow-vogue.site
  • Beauty
    • Beauty
    • Arab Beauty
    • Asian Beauty
    • British Beauty
    • Canadian Beauty
    • Indonesian Beauty
  • Cosmetics
  • Fashion
    • Fashion Over 50
    • Luxury Fashion
    • Plus Size Fashion
    • Sustainable Fashion
    • Women’s Fashion
  • Hair Styling
  • Skin Care
  • Uncategorized
Tag:

Girls

Canadian Beauty

The Real Silk Press Guide: For Girls Who Want Sleek Hair Without Losing Their Curls

by Lina Clémence June 19, 2025
written by Lina Clémence


The Real Silk Press Guide: For Girls Who Want Sleek Hair Without Losing Their Curls

Alright, so let’s talk silk presses. Because if you’ve ever done one, you know there’s a fine line between silky smooth and fried-to-the-point-of-no-return. I love a good press, don’t get me wrong. That first-day bounce? That shine?? Ugh. Nothing hits like it. But let’s be honest—if you’re not doing it right, your curls might not bounce back. And then my be wondering why your twist out is not acting right.

So I put this guide together for anybody who wants their silk press to actually last without wrecking their hair. Especially if you’re tired of blogs giving you the same recycled advice with no nuance. We’re getting into all the stuff they usually skip.

What Even Is a Silk Press?

If you’ve ever used a flat iron and thought, “Oh, this is a silk press,”—girl, no. It’s not. A silk press is more than just straightening your hair. It’s a technique. It’s product. It’s prep. It’s tension. And honestly, it’s kind of an art form. The goal? Make your natural hair look like you got a relaxer… without actually relaxing it.

And when it’s done right? It moves. It shines. It gives that body and shine you always wanted

Your Hair Type Matters—Like, a Lot

This is the part most people skip over. You can’t give the same silk press advice to a 3A curl pattern that you give to 4C hair. It’s not the same at all.

Here’s the deal:
  • 3A–3C? You’ll probably need way less heat. Your hair might silk out fast but watch for limpness or frizz if you go too hot.
  • 4A–4C? You need real prep. I’m talking deep moisture, protein balance, and a blow-dry that stretches the hair properly without frying it. If you skip the prep, you’ll be looking in the mirror wondering why it came out puffy.

Also, porosity matters too. I know that’s the nerdy part of hair care, but if your hair sucks up water like a sponge (hi, high porosity), you need products that seal that moisture in or your press won’t last. Period.

🧴 Scalp Care Deserves a Whole Section

Everyone talks about silk pressing the hair, but what about the scalp? Just because you straightened your hair doesn’t mean you should ignore your roots.

I like to massage a little lightweight oil or use a scalp mist that doesn’t make my hair revert. Especially around the edges and crown, where my scalp gets dry faster. If your head’s itchy after a silk press, that’s your sign. Show your scalp some love!

Preparation = EVERYTHING

I used to think silk pressing was about having a good flat iron. Nope. It starts way before that. Like… before you even blow dry.

Here’s my prep:
  • Clarify your hair. Get rid of buildup or the flat iron will just be cooking product into your strands.
  • Deep condition like your life depends on it. You want that moisture locked in.
  • Use a heat protectant that actually works (I’m not naming names but some of these brands are just scented water).
  • Blow dry with tension—gently. Stretch the hair without burning it. I use a comb attachment but a paddle brush or round boars brush works too.

And please… make sure your tools are clean. That flat iron from 2024 with the gunk on the plates? Toss it.

Products I Trust (And Why)

I’ve tried everything from drugstore to salon-level and let me tell you: sometimes the $8 serum slaps just as hard as the $30 one. It’s about ingredients and how your hair responds.

A few I love:
  • Heat Protectant: CHI 44 Iron Guard or Mielle’s heat serum
  • Smoothing Serum: Design Essentials Silk Essentials (smells amazing, too)
  • Anti-Humidity Spray: ORS or even a light mist of Sebastian Shaper if you’re fancy
  • Finishing Oil: Vegamour weightless repair hair oil

And honestly? Sometimes I just go to YouTube and look up what hairstylists are using right now. They know what’s up.

How to Make It Last Longer Than a Day

Here’s where it all falls apart for most of us: the maintenance.

Nighttime is key. Wrap it, pin curl it, pineapple it—whatever works for your hair texture. But don’t just sleep on it and expect it to look fresh in the morning. You will wake up lookin’ like humidity hugged you all night.

I personally:
  • Wrap with a satin scarf
  • Sleep on a silk pillowcase as backup
  • Use dry shampoo at the roots after day 3
  • And I don’t keep running my fingers through it (I know it’s tempting, but don’t do it)

🌀 Getting Your Curls Back Without Tears

Let’s say your silk press is done. It was cute. You got your selfies. Now you wanna go back to your curls. Please don’t just wet your hair and hope for the best.

Do a gentle cleanse and follow up with a protein + moisture treatment. If your curls look limp or weird… that might be a little heat damage. I’ve had it happen. It’s not the end of the world. Trim what needs trimming, deep condition like crazy, and give your curls time to bounce back. No panic.

And also? Your hair is still beautiful, even if that one curl won’t coil up the same anymore. Don’t beat yourself up.

Keep Your Hair Thriving Between Presses

Don’t press too often. I personally aim for once every 6–8 weeks if my hair feels healthy. Some stylists will say 3–4 times a year, and that’s probably better long-term. In between, I live in twist-outs, wash & gos, or just a cute puff with my edges laid.

I also do regular trims, deep treatments, and no heat unless I absolutely have to. My motto? Just because it’s straight doesn’t mean it’s healthy.

🌍 The Part Nobody Talks About: Culture, Identity, and Hair Choices

Let’s be real. Silk presses aren’t just about looks. For a lot of us, it’s about versatility. About showing that our hair can do both. But sometimes people act like wearing your hair straight means you’re trying to be more “acceptable” or not embracing your natural texture. And… no. It’s not that deep. Or sometimes it is. But only you get to define that for yourself.

Silk presses are a choice. And choosing to style your hair one way doesn’t cancel your love for the way it grows out of your head. Period.

❓ Random Silk Press Questions You Might Be Too Shy to Ask

  • Can I silk press dirty hair? Clean hair only.
  • Why is my silk press frizzy already? Could be humidity or poor prep.
  • Is it better to go to a pro? For your first time, absolutely. You’ll learn so much.
  • Do I need special tools? Kinda. A good flat iron makes a huge difference.

Final Thought

Look. I love a silk press. I love how it feels. I love the way it moves when the wind hits just right. But I love my actual hair even more. So if I’m gonna press it, I’m gonna do it right. No shortcuts. No regrets.

What’s your silk press secret weapon? Or horror story? Drop it in the comments.

nataliemochinsbeautyblog

Hi, my name is Natalie and I love all things beauty and hair care. I started this blog in 2017 to share my thoughts on ideas when it comes to hair care and the beauty industry.
I provide information about the many hair care questions you may have and also provide product reviews.
I want to make a career out of my love for the beauty industry and eventually become a licensed hair stylist.

Previous:
7 Tips to Improve Your Night Hair Routine with Natalie


June 19, 2025 0 comments
0 FacebookTwitterPinterestEmail
Hair Styling

4 Easy Headband Hairstyles For School In 5 Minutes | Hairstyles For Girls

by Lina Clémence June 14, 2025
written by Lina Clémence


Cute, no-heat headband hairstyles for every day wear! 

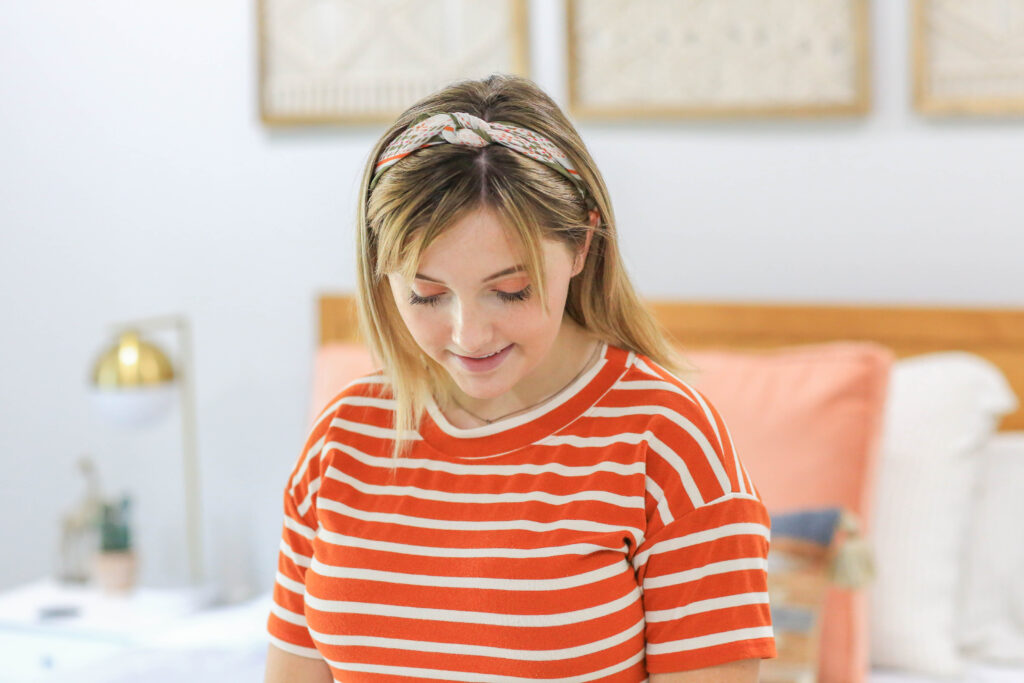
Hey guys! We are always looking for simple and quick hairstyles for school mornings and thought these headband styles from our YouTube channel would be perfect for back to school season. These “5 minute hairstyles” are all super easy but still look fashionable, even though they take very little effort!  The headbands add a stylish finishing touch and of course can be changed up and matched to your outfit of the day.

4 Simple Headband Hairstyles Video Tutorials:


(Click here to watch the video directly on YouTube.)

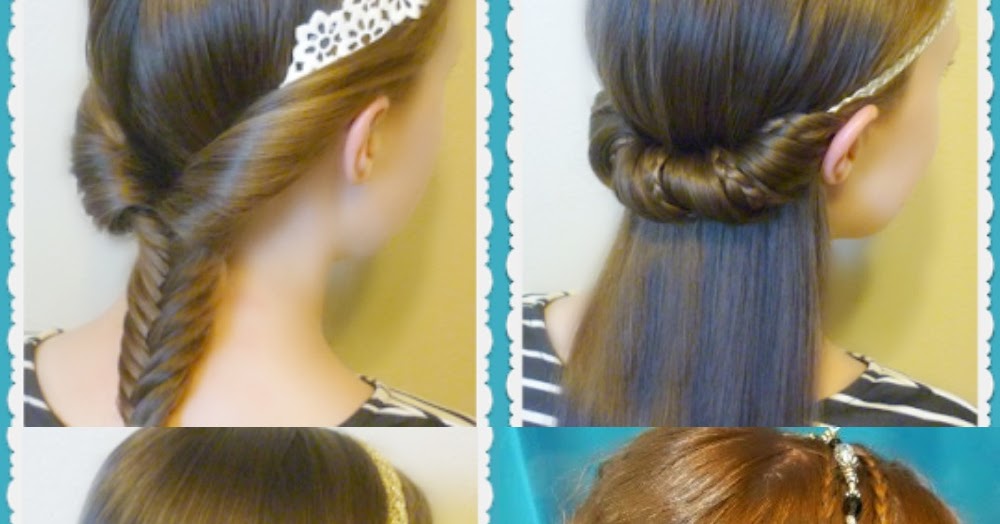
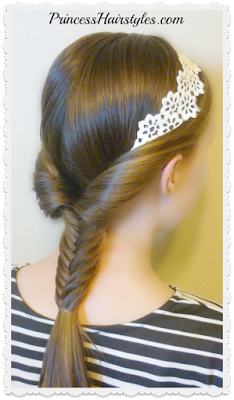
Hair tutorial #1 features a classic twist on each side of her head, finishing in a low fishtail braid.

Adorable headband hairstyle with fishtail braid

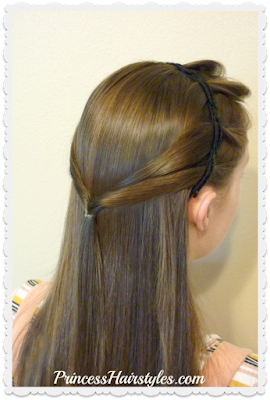
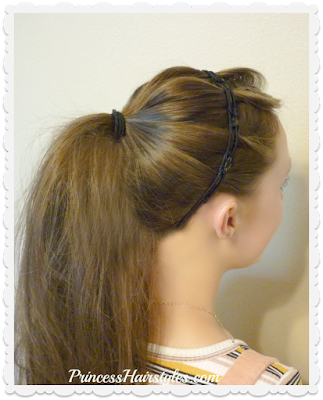
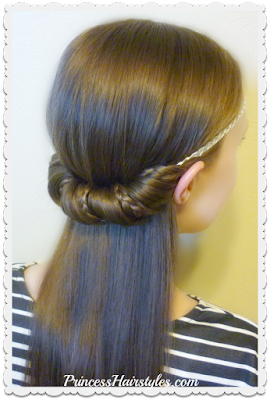
Hairstyle #2 is a trendy half up hairstyle with extra micro braids wrapping around the headband. We used a silver braided headband and placed it high on her forehead.

Quick and easy half up hairstyle using a headband


Hairstyle #3
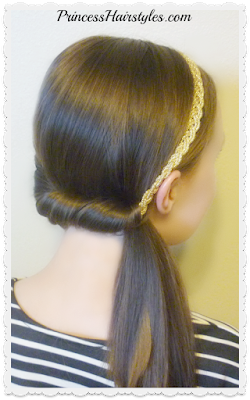
is the easiest of all! A fancy side ponytail with a twist wrapping around the back.

Easiest hairstyle for school. Side ponytail and headband.

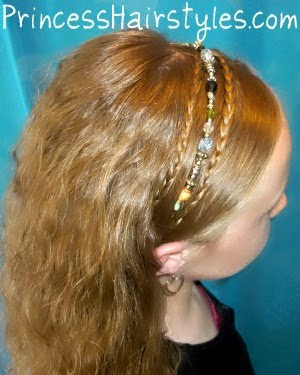
Hairstyle #4 features a pretty beaded headband placed between 2 small braids. We created no heat waves by sleeping in braids overnight to complete this look.

Boho braids and beaded headband hairstyle. Video tutorial.

All four of these hairstyles can be done with straight hair, wavy hair, or curly hair. Medium length hair or long hair will work best.

Link for the Topsy tail (affiliate) as shown in hairstyle tutorial #2


June 14, 2025 0 comments
0 FacebookTwitterPinterestEmail
Hair Styling

Easy DIY ZOOM Hairstyles | Cute Girls Hairstyles

by Lina Clémence June 7, 2025
written by Lina Clémence


With all the #Zoom classes going on, Rylan is back today to teach you her 3 EASY DIY Zoom Hairstyles that can each be done in 1-3 minutes! If you are like Rylan, you want to sleep in AS MUCH AS YOU CAN until that first Zoom call in the AM, so a quick 1-minute hairstyle tutorial gets you that much closer! Which one is your favorite?

Items Needed: Brush, rat-tail comb, spray bottle, hair elastics, bobby pins, scrunchie, bandana or head scarf, hairspray {if desired}.

Time Requirement: 1-3 minutes each

Skill Level: Easy

Double Pigtails with Braid Cuffs

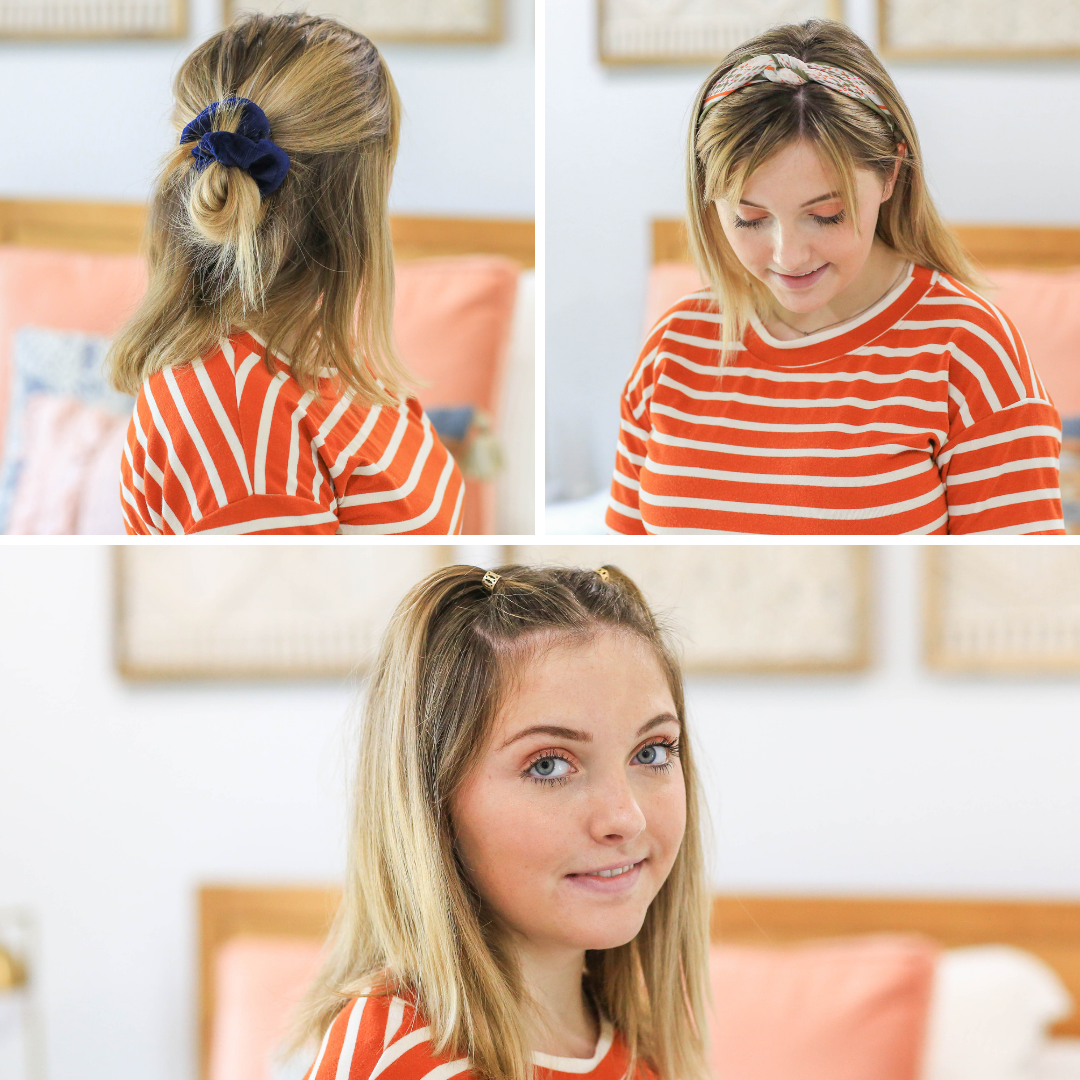
Part your hair down the middle of the head. Section off a small square section on the right of the part, and secure with a small elastic. Section off a small square section on the left of the part (equal to that of the right), and secure with a small elastic. Take 2 decorative braid cuffs and clamp them down near the base of each pigtail. Lastly, add hairspray (if desired)!


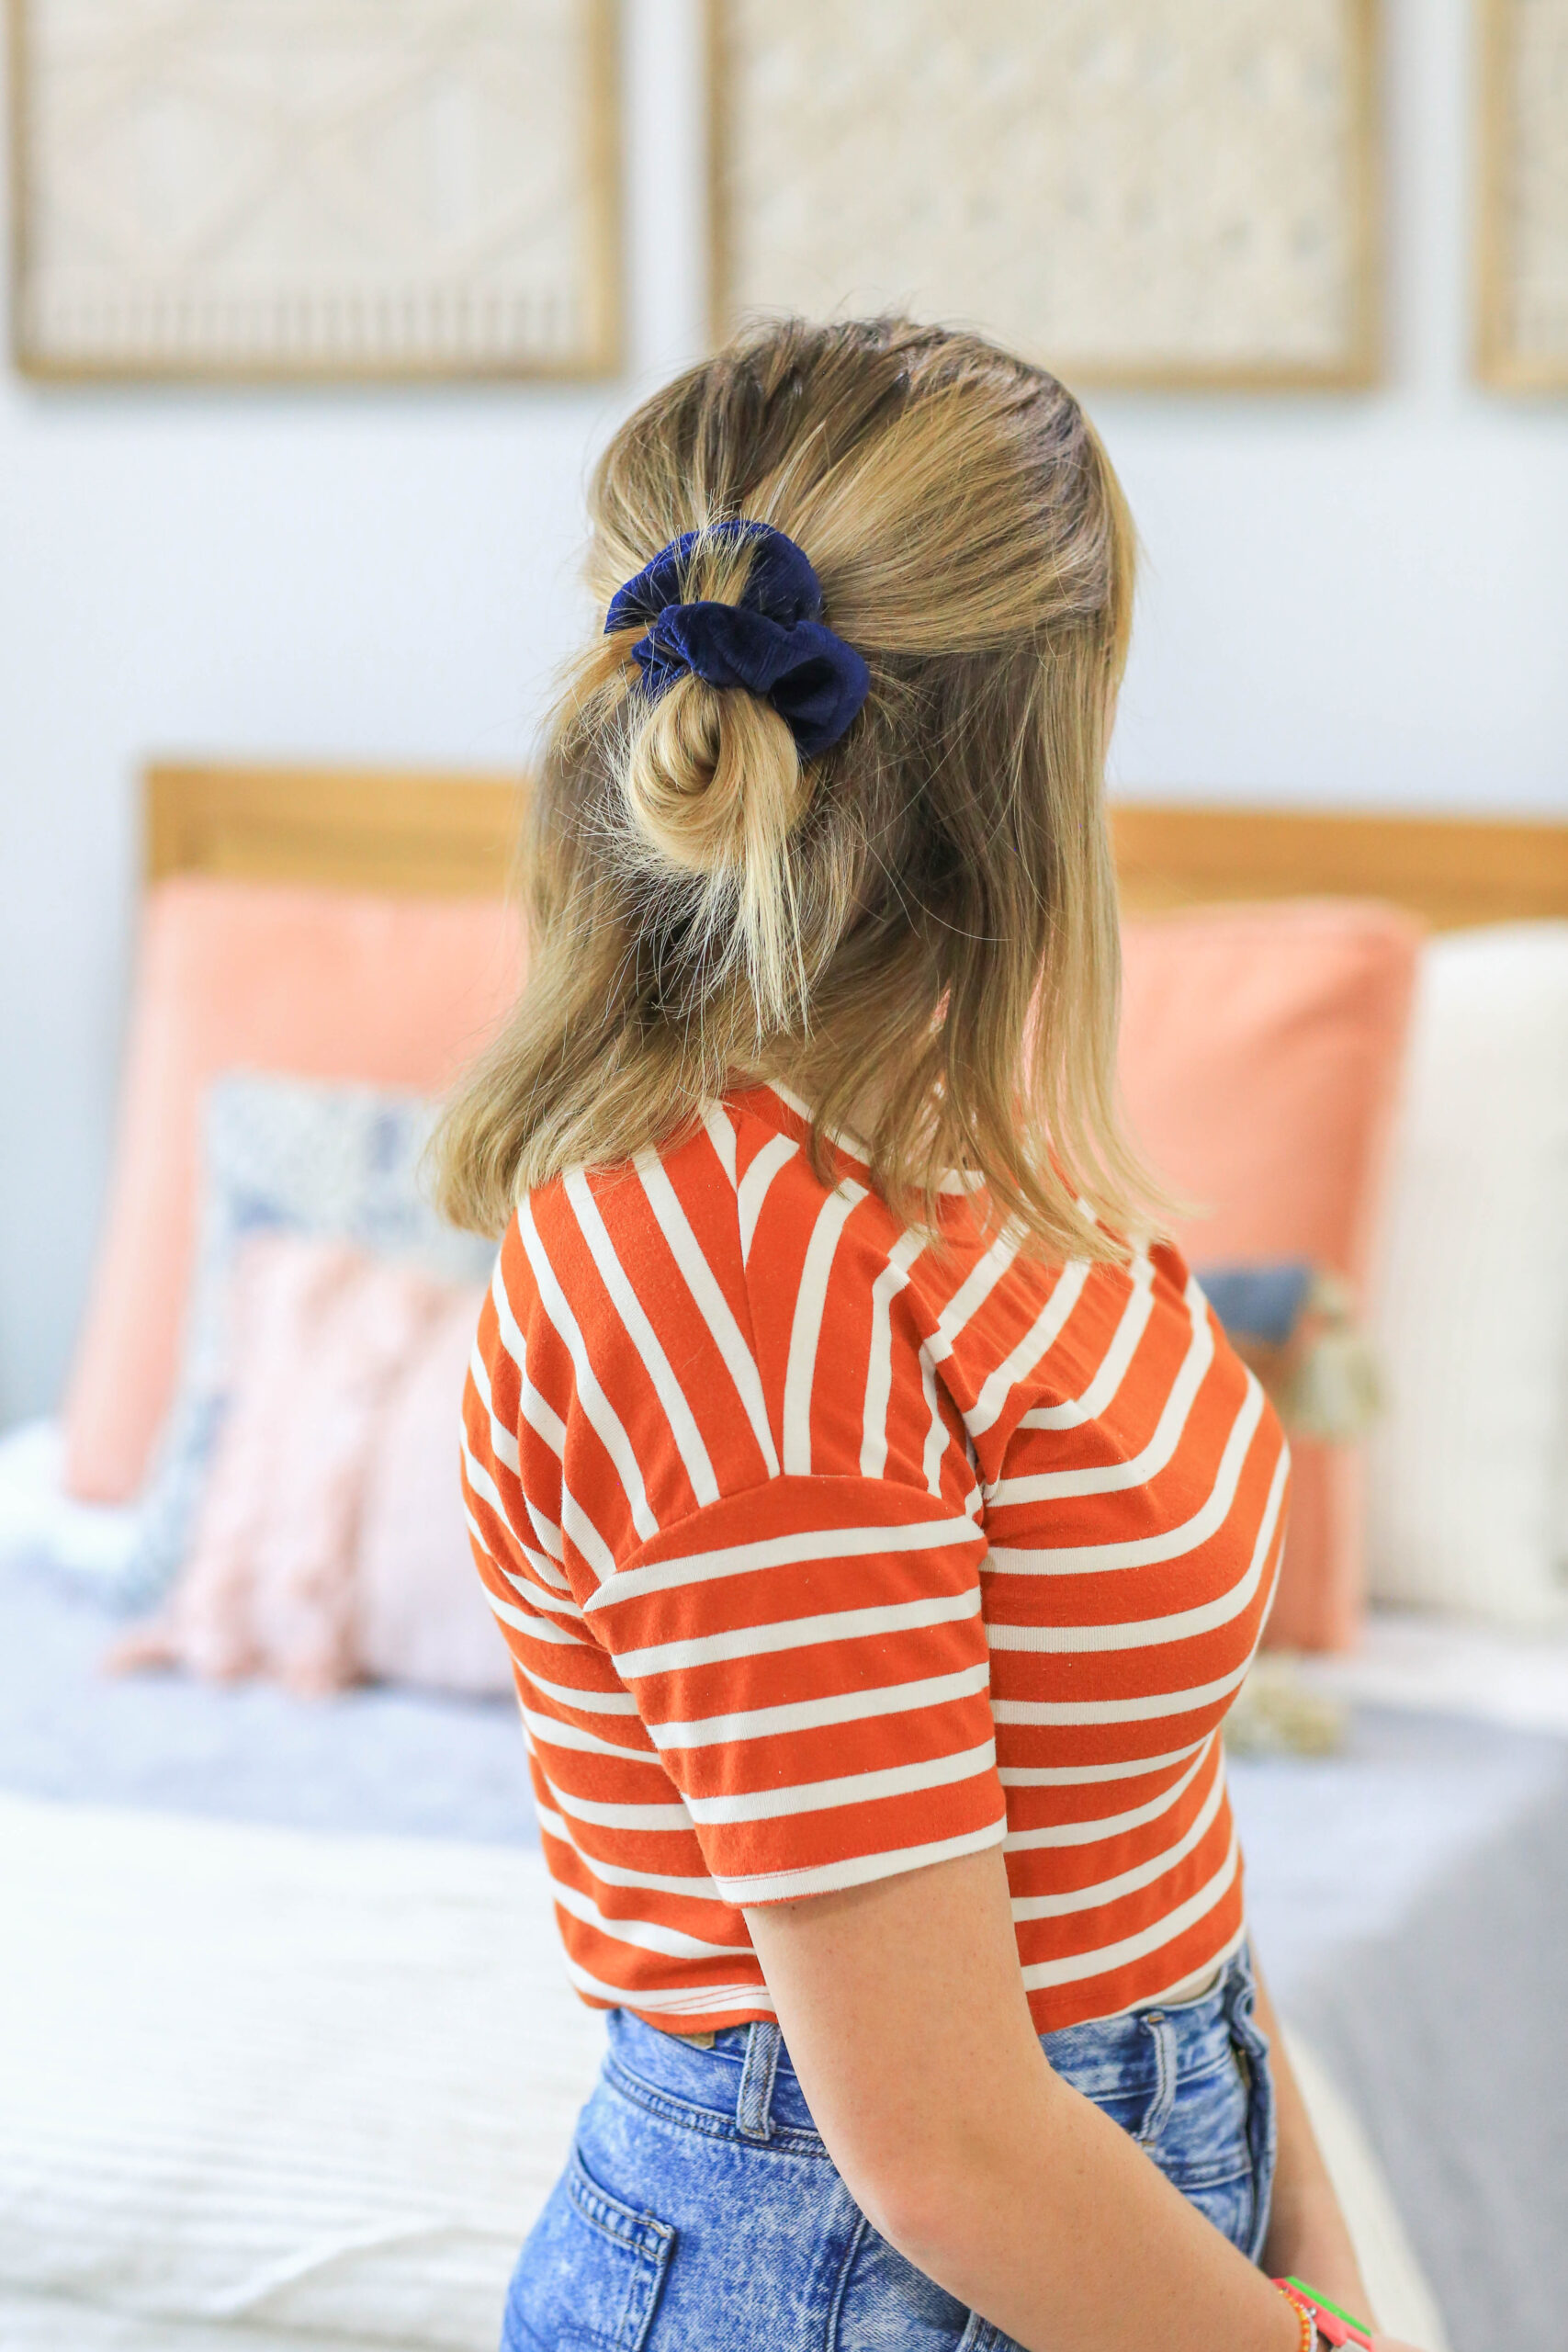
Half-Up Low Scrunchie Bun

Part your hair however you prefer, right, left, or center. Part the hair back using your thumbs above each ear and secure in the back with a large scrunchie into a bun. Adjust the scrunchie to get the desired tightness/looseness desired for the bun. Add hairspray (if desired)!


Headscarf Headband

Part your hair however you prefer, right, left, or center. Take a bandana or silk headscarf and fold it once diagonally. Then take the headscarf and fold it down several times to your desired width (and secure the tiny triangle tip using the bobby pin hack I show you). Place the folded scarf evenly at the base of your neck, and bring the ends up and over the hair and secure using the first step of a knot. Instead of tying the seconds step of a knot bring each end down and secure behind the ear with a bobby pin. Add hairspray (if desired)!


Watch the full tutorial:


June 7, 2025 0 comments
0 FacebookTwitterPinterestEmail
Hair Styling

2 Updo Hairstyles For Homecoming | Hairstyles For Girls

by Lina Clémence May 31, 2025
written by Lina Clémence


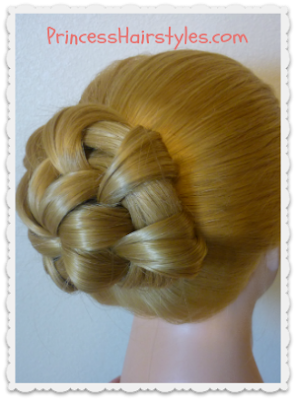
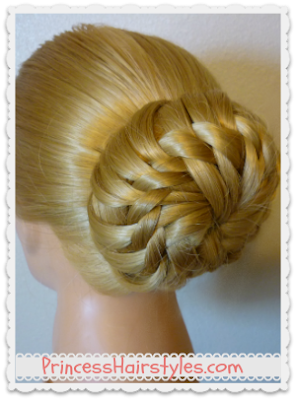
Today’s hair tutorial video features 2 of our favorite bun hairstyles that we thought would be perfect for Homecoming or Prom.  If you are looking for a unique and fairly easy updo, either of these sleek and glamorous buns will do the trick. 

We originally posted these hairstyles 5 years ago when my daughter was only 11.  She’s 16 now and will actually be going to her own High School Homecoming in a few weeks! We are assuming many of you have never seen this video, so we wanted to resurface it again.

Star and Flower Bun Video Tutorials: (Click here to watch the video directly on YouTube.)


This tutorial shows how to create these bun hairstyles using a knotted braiding technique. These 2 styles would not only be great for formal dances, but many other occasions including: Weddings (bridal hairstyle, or flower girl hairstyle) communions, baptisms, recitals, church, Easter, etc.

Star Bun Hairstyle

Unique updo hairstyle for special occasions. Star bun video tutorial.

Flower Bun Hairstyle

Gorgeous bun for Prom or wedding hairstyle. Video instructions.

Even though these 2 updos look quite intricate, you will find that they are actually pretty quick and easy to create!

Supplies needed:

  • One hair tie for the top of the ponytail.
  • Several bobby pins.
  • Finishing hairspray, gel, wax, etc. 


Source link

May 31, 2025 0 comments
0 FacebookTwitterPinterestEmail

Categories

  • Arab Beauty
  • Asian Beauty
  • Beauty
  • Beauty
  • British Beauty
  • Canadian Beauty
  • Cosmetics
  • Fashion Over 50
  • Hair Styling
  • Indonesian Beauty
  • Luxury Fashion
  • Plus Size Fashion
  • Skin Care
  • Sustainable Fashion
  • Women's Fashion

Recent Post

Recent Comments

No comments to show.
  • Arab Beauty (17)
  • Asian Beauty (32)
  • Beauty (32)
  • Beauty (1)
  • British Beauty (31)
  • Canadian Beauty (30)
  • Cosmetics (32)
  • Fashion Over 50 (1)
  • Hair Styling (33)
  • Indonesian Beauty (33)
  • Luxury Fashion (32)
  • Plus Size Fashion (65)
  • Skin Care (32)
  • Sustainable Fashion (33)
  • Women's Fashion (33)
  • Mari Tetap Menulis di Era Gempuran Audio Visual
  • Evolution
  • Milbon’s New Curl Collection – Anh Co Tran
  • Chinese AI startup MiniMax reportedly eyeing Hong Kong IPO
  • How to Build a Sustainable Wardrobe with Style — FASHION me GREEN

@2025 - All Right Reserved. Designed and Developed by Mahasun


Back To Top
glow-vogue.site
  • Beauty
    • Beauty
    • Arab Beauty
    • Asian Beauty
    • British Beauty
    • Canadian Beauty
    • Indonesian Beauty
  • Cosmetics
  • Fashion
    • Fashion Over 50
    • Luxury Fashion
    • Plus Size Fashion
    • Sustainable Fashion
    • Women’s Fashion
  • Hair Styling
  • Skin Care
  • Uncategorized